Android phones offer immense flexibility and customization options, especially with their cameras! There are plenty of settings and options to choose from, but what do they all do? In this guide, we'll tell you about the best Android camera settings!
Android Camera Settings, Features, And How to Access Them
Keep in mind that every Android phone is different, so they have different capabilities. However, there are common features shared across Android devices that you can take advantage of. Some are unique to a particular phone or brand, so keep that in mind as you search for the device that's right for you!
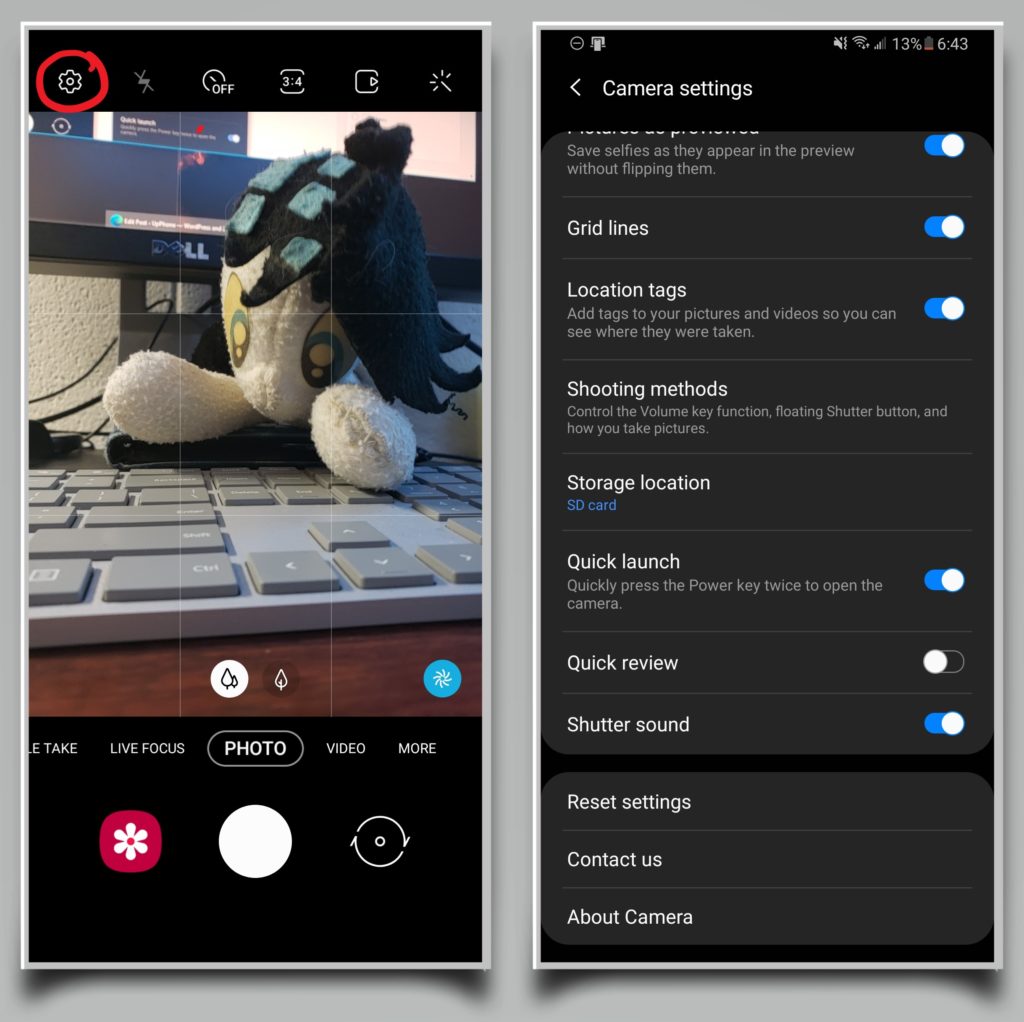
Android camera settings can be found by opening the system camera app, then tapping the gear icon at the top of the screen. The resulting screen will show you a lot of the features you have at your disposal. Let's talk about a few of them.
Quick Launch Your Camera
Picture-perfect moments may only last a few seconds, but they don't have to be gone forever. A useful feature called quick launch allows you to ready your camera for action with a simple double tap of your power button. To enable this, go to your Android's camera settings and select Quick launch.
How to Change Android Camera Video Quality
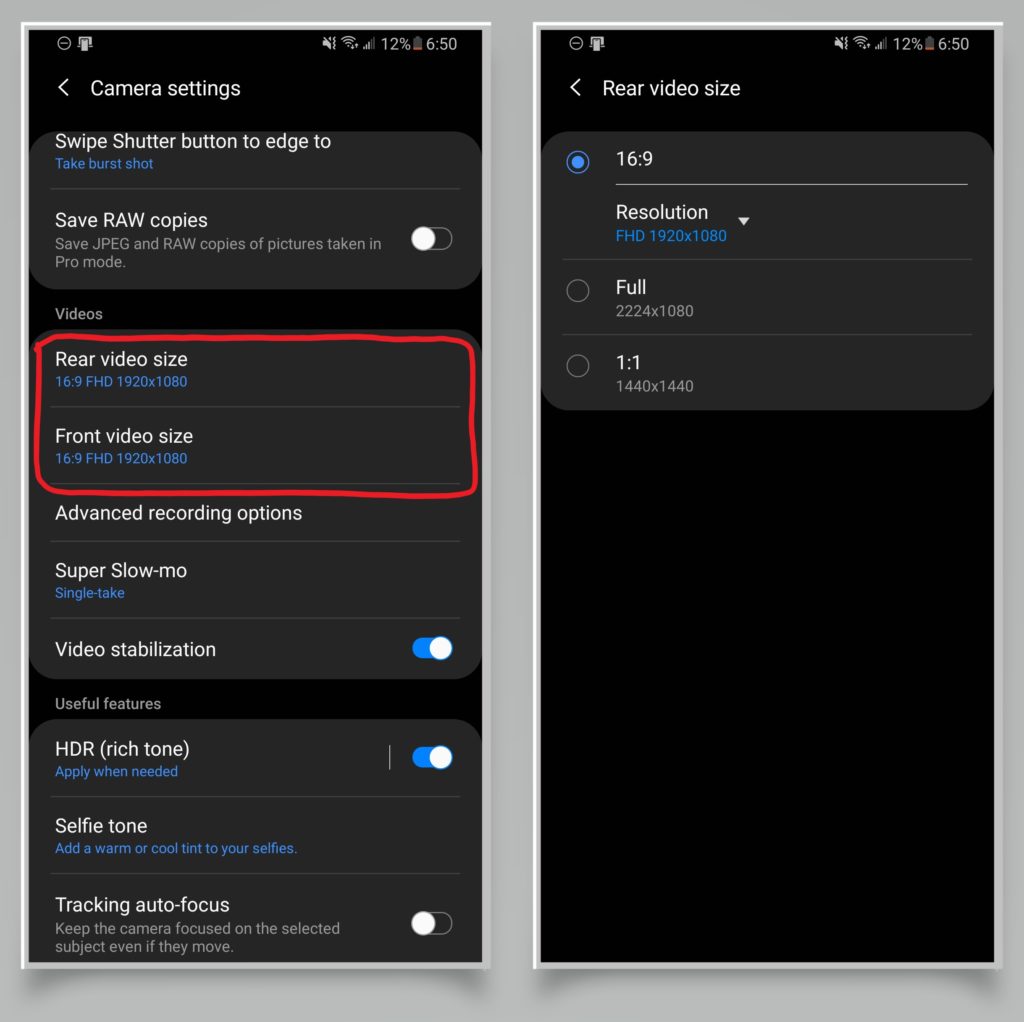
Capturing action as it happens has become easier than ever before, and Android devices give you full control over the quality and size of your videos. To alter how you take your videos,
- Open your Android camera
- Tap the gear to get into your settings
- Find rear video size or front video size
- Use higher resolutions for better quality video at the expense of storage space. You can also set the framerate to choose how smooth you would like your videos to appear.
Keep in mind that framerates above 60 FPS are typically only accessible through the slow motion or super slow-motion features of your camera and can't be turned on for all videos.
Applies To: Samsung Galaxy Note 9, Samsung Galaxy S10
Enable QR Code Scan
QR codes are a great way to share information in the real world, such as sending contact information and website links. If you'd like to scan these bar codes with your Android's camera, you'll need to make sure that the setting is enabled. Just tap on this selection from the settings screen to toggle it on or off.
Turn on Grid Lines
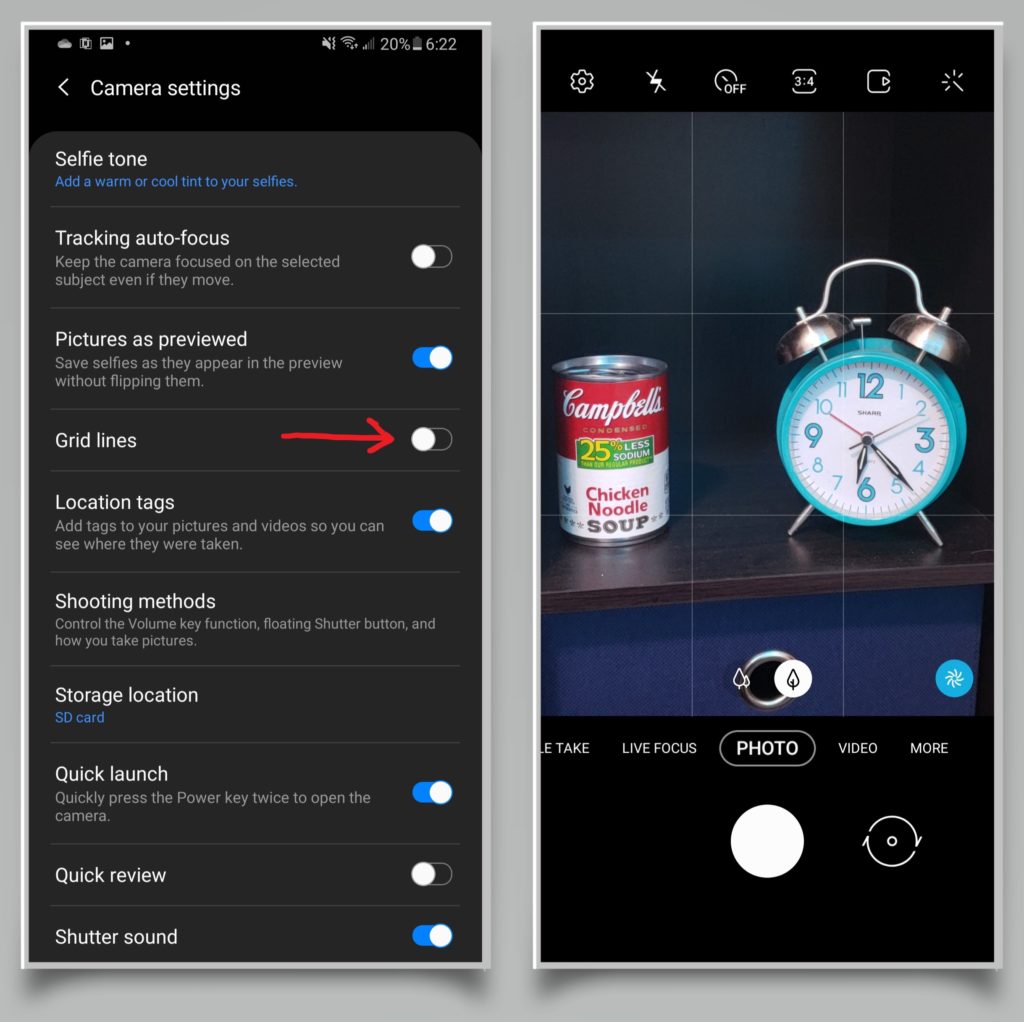
This feature provides a visual guide on your screen to help you take photos. It can help you center your photos and follow the rule of thirds, if you'd like to take truly unique pictures with your Android camera. You won't see the lines in the final pictures that you take.
Tap Settings, then choose Grid lines to enable this feature.
Location Tags
Your phone can automatically assign a geotag to the photos you take so you can keep track of where they were captured. This might be helpful when, for example, you're on a road trip.
In your Android camera settings, tap location tags to toggle this feature on and off. If it is turned off, the photos that you take afterward will not include any location information.
Your gallery can also sort photos by location. In Google Photos, tap the search bar at the top. At the bottom of the screen, you'll see a short list of locations. Choose show more to display a grid list of all the places where your photos were taken.
Turn on Automatic HDR
HDR (High Dynamic Range), or rich tone, is a camera feature that combines multiple exposures for higher quality photos. This powerful tool can set you apart.
Open your camera settings and press HDR (rich tone). This should bring you to a screen that allows you to turn HDR on and off. Alternatively, you can set it to apply when needed or always apply, depending on your preference.
Change Your Storage Location
One of the benefits of many Android phones is their expandable storage, which allows you to use a microSD card as a storage location for your camera's photos and videos. You can change the storage location in your camera's settings. Here, you have the option to select either internal storage or an SD card.
Pro Mode
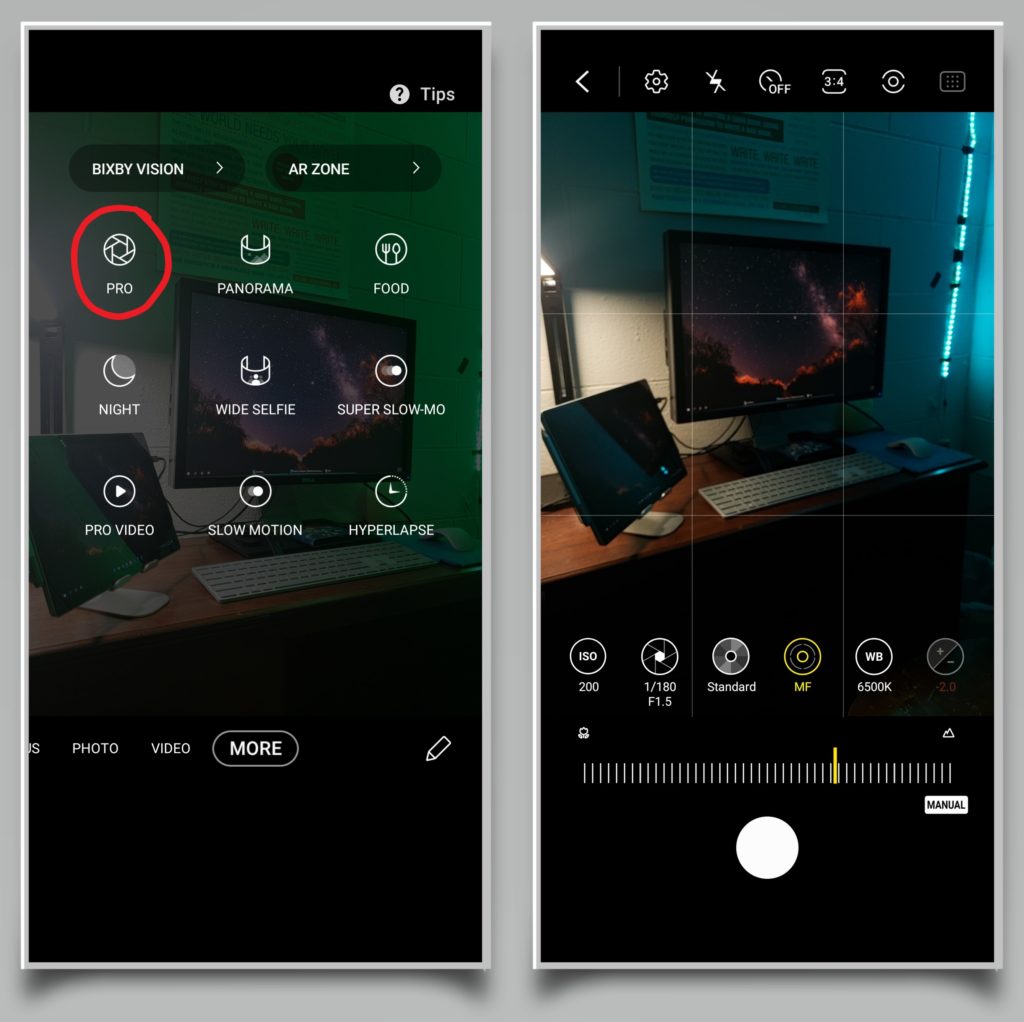
This is best for Android users who want full control of their phone's camera settings. Using pro mode will allow you to manually adjust capture settings for your camera such as the ISO, aperture, color, focus, and temperature.
These are more advanced features, but one easy and interesting application of pro mode is the ability to take pictures of bright subjects or the night sky. For instance, closing the aperture can prevent excess light from entering the lens, which allows you to take more detailed images of the moon.
Other Android Camera Settings
Here are a few other Android tips and tricks that will help you take full advantage of your smartphone's camera.
Change Shooting Methods
It can be inconvenient to take pictures using the shutter button on the screen. This can be altered by toggling on additional capture methods by selecting shooting methods.
Here, you can make a variety of changes, such as assigning different actions to your phone's buttons when using your camera. One example would be using your volume key to take pictures or zoom in, in addition to adjusting your phone's volume.
You can also take pictures using your voice. This is great for group pictures; all you need to do is say “cheese!” Other shooting methods include a floating shutter button that you can move around the display, as well as the ability to use your palm to capture selfies.
Try the Camera Timer
A camera timer can make it easier for you to take pictures hands free or with a group of people. On most phones, this setting is accessible from the main camera screen at the top. Just tap the timer icon to receive a list of options.
The available interval may range from two seconds to ten seconds. Once you pick the interval, tapping the shutter button will start the countdown. When you're done, just tap the timer icon again and tap off to disable the feature.
Changing the Aspect Ratio
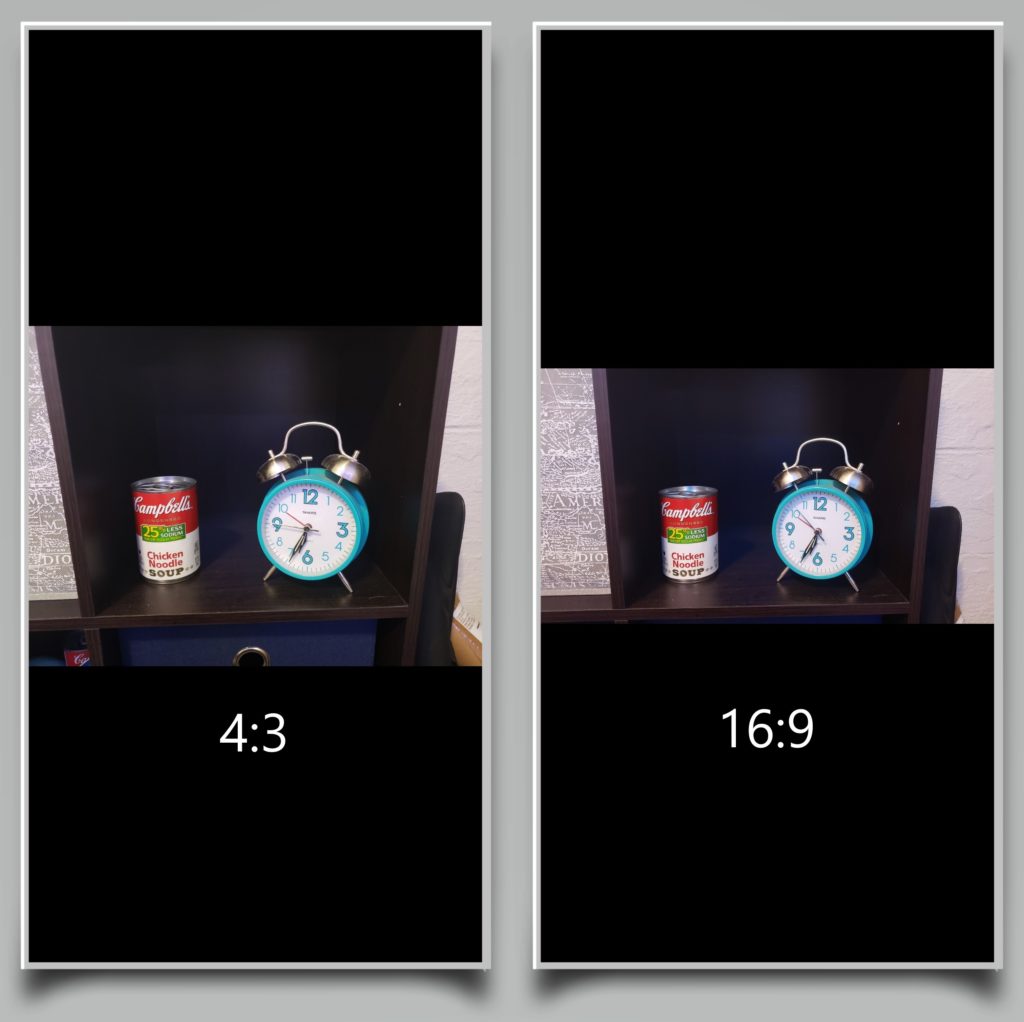
Aspect ratio is a photo's relative width and height relationship, although the dimensions will vary depending on your camera. A 1:1 aspect ratio would be shaped like a square, while 4:3 is more rectangular. 16:9 is a great aspect ratio for viewing on most devices, however it's best viewed if your phone is turned on its side in landscape mode.
If you'd like to change the aspect ratio, the options could either be at the top of the main Android camera screen or in your settings. Keep in mind that using an aspect ratio that fits the whole space of your screen may not be easily viewable on other devices and may need to be cropped.
The Best Android Camera
If you want the bleeding edge of Android camera technology, you should consider the Samsung Galaxy S20. Each of its four rear cameras combine to allow a maximum resolution of 108 megapixels (MP). By comparison, the rear cameras on the iPhone 11 Pro Max are only 12MP.
This means that the Galaxy S20 Ultra can zoom in farther and with more clarity than any other smartphone currently on the market – up to 100 times zoom! Not only can it zoom in extremely far, but its four cameras can enable a user to take ultra-wide shots. It even comes with night mode for low light areas.
If a camera that can zoom in 100 times is a bit extreme for you, the Galaxy S20 and Galaxy S20+ 5G both have very capable cameras with similar abilities, including all of the features discussed above.
Say Cheese!
Now you know everything you need to about the settings on your Android's camera. Thank you for reading, and please share with your friends and family to help them make the most out of their smartphone's camera settings. Feel free to leave a comment down below with any other questions you might have about your Android device.

Does my android take pictures of me?
thanks for the article, I just got a new phone and the manual has no info on the camera settings at all, most settings not even mentioned. Your article was very helpful.