Screenshots are very convenient, especially if you need to save instructions from an email or send a friend something you were looking at on Amazon. In this article, I'll show you a few different ways to take a screenshot on a Samsung Galaxy S9!
What Is A Screenshot?
Before diving into our step-by-step guide, I want to explain what a screenshot is. In short, a screenshot is an image of whatever was on your phone's screen.
It's a useful function that can make saving snapshots of information simple. It's made even easier because all screenshots are automatically saved to a specific album in your phone's Gallery. This album is appropriately named Screenshots.
How To Take A Screenshot On A Samsung Galaxy S9
There are a handful of different ways to take a screenshot on a Samsung Galaxy S9. You can take them by using:
- The physical buttons of your Galaxy S9
- Palm swipe
- A Bixby voice command
- Scrolling capture
Each option has its own advantages, so it's really up to you when deciding which one to use.
If you're looking to learn how to take a screenshot on another device, try our guide for How To Screenshot On An iPhone: The Simple Guide!
Using The Buttons
Personally, this is my favorite way to take a screenshot. It's fairly straightforward and incredibly convenient.
- Open what you'd like to screenshot on the display of your Samsung Galaxy S9.
- Simultaneously press and hold the volume down button and the power button for about 2 seconds.
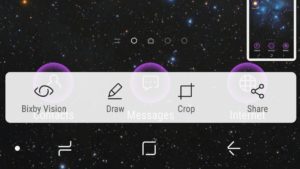
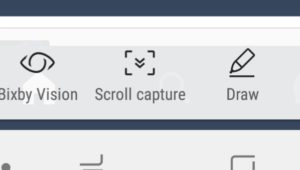
- Your screen will briefly shrink and a grey bar will appear with the options Bixby Vision, Draw, Crop, and Share. (If you want to use any of these functions right away, now is the time!) This acts as a notification of a screenshot being taken.
- Your screenshot will automatically be saved in the Gallery in the Screenshots album.
Palm Swipe
The Palm Swipe is a less conventional method of taking a screenshot on your Samsung Galaxy S9. While it isn't my way to take a one, I understand why some people might find it preferable.
However, before you can dramatically swipe across your phone display, you have to turn on Palm Swipe.
To turn on Palm Swipe:
- Open Settings.
![]()
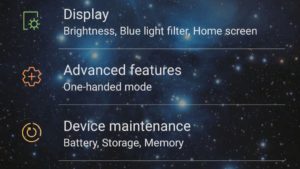
- Tap Advanced Features.
![]()
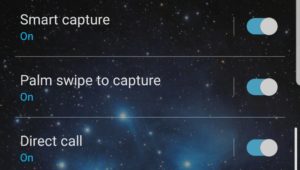
- Scroll down until you see Palm swipe to capture. Make sure the slider is positioned to the right, indicating that it is on.
![]()
Now that you've turned on Palm Swipe, you can use it to take screenshots. Here's how to take a screenshot on your Samsung Galaxy S9 using Palm Swipe:
- Open what you'd like to screenshot.
- Place the side of your hand on the left or right edge of the screen and, in a smooth motion, swipe it across the face of your Galaxy S9.
- A gray options bar will appear to let you edit or share your screenshot.
- Your screenshot will be saved in the Screenshots gallery once you're all set!
![]()
Bixby Voice Command
Although I'm usually not a big fans of voice commands, they can be useful when your hands are preoccupied. Using Bixby is the most hands-off way to get a screenshot of your Galaxy's display.
To take a screenshot using a Bixby voice command:
- Open what you'd like to take a screenshot of.
- Press and hold the Bixby Button, which is located on the left side of your Galaxy S9 and under the volume buttons.
- Once the Bixby interface has activated, say, “Take a screenshot.”
- The screenshot will be instantly saved to the Gallery for later viewing and editing.
As I said before, you can also activate Bixby using the voice command “Hey, Bixby.” However, you must first set up the Wake-Up Command feature of Bixby in order for this to work. I'll show you how to do that below:
- Navigate to the Bixby homepage by swiping as far as you can to the left on the Home screen.
- On the Bixby homepage, select the More Options button in the upper right-hand corner (represented by three dots in a vertical line).
- Choose Settings.
- Tap Voice wake-up.
- Use the slider to switch Voice Wake-Up on. You'll know it's on when the slider is blue.
Once you've turned Voice Wake-Up on, you can take a screenshot by simply saying “Hey, Bixby, take a screenshot.”
It's important to note that when you take screenshots using Bixby, you won't be given any of the instant editing options.
However, you can string together commands. For example, you can take a screenshot and post it directly on Facebook by saying, “Take a screenshot and share it to Facebook.”
Scrolling Capture Screenshots
A Scrolling Capture screenshot is a bit different than the other methods I've mentioned in this article. It allows you to take a picture of more than just what's on your screen.
Scrolling Capture helps you to take screenshots of entire websites or long article. It does this by capturing multiple images and automatically scrolling down in between each shot. The screenshots are automatically connected into one very tall image.
- Open what you'd like to take a Scrolling Capture screenshot of. Make sure the app you're in allows vertical scrolling.
- Start at the top of your selected item. Scrolling Capture screenshots only go downwards.
- Simultaneously press and hold the power button and the volume down button for a couple of seconds, or use the Palm Swipe method to take the first screenshot.
- Tap Scroll Capture when the gray options bar appears.
- Continue to tap Scroll Capture until everything you want is captured.
![]()
- You'll have the option to edit or share your screenshot before its saved in your Screenshots gallery.
Vertical screenshots are very useful, especially when you want to share entire articles or multiple pictures that relate to one another!
Give It Your Best Screenshot
I hope this article helped you to understand all the different methods of taking a screenshot on a Samsung Galaxy S9. If you have any questions, feel free to leave them in the comments below. Don't forget to share this article on social media with the Galaxy S9 lovers you know!

