Taking pictures with your cell phone is easy. All you need to do is open the Camera app to start capturing any given moment. While cell phone cameras are pretty intuitive, using your computer is a different story. Have you ever wondered how to take a picture on a computer?
There are a few different ways to take pictures on computers. For example, if you want to take a picture of what's on your screen, you can take a screenshot. However, if you want to take a picture of something in the real world, you'll need to use an external or built-in webcam.
In this guide, I'll show you how to do both! I'll give you my recommendations on how to take screenshots and regular pictures on your computer. These step-by-step instructions will work for Windows 10 PCs and MacOS computers. Let's get started!
Taking Pictures With A Webcam
Taking pictures with a webcam may not have as many uses as taking pictures with your smartphone, but it can still come in handy. For example, you can easily use your webcam to take a picture of yourself if you need a new profile picture. You can also use this feature to send selfies to your friends while you're chatting!
Some computers even have rear cameras. This might be useful for taking photos of your instructor's notes in class or at the office. I've also used this feature to scan photos of documents with my Microsoft Surface Pro 4.
How To Take A Picture On A Computer (Windows 10)
To take a picture on your Windows 10 computer, follow these steps:
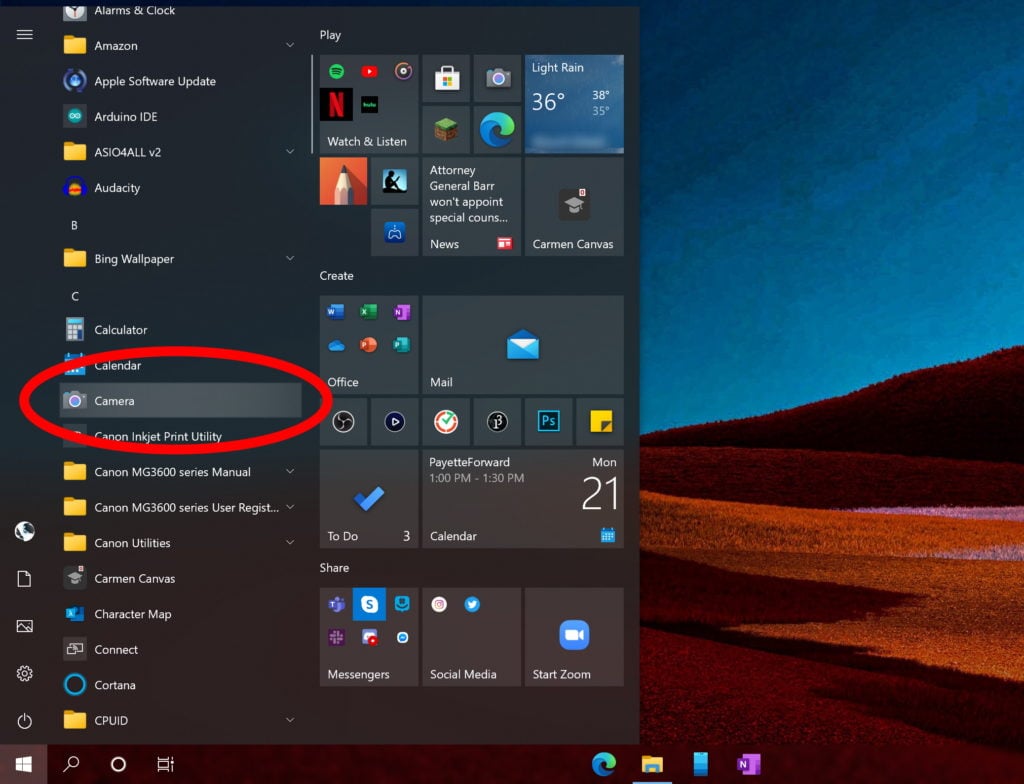
- Open your Camera app by typing Camera into the search bar, or by clicking on it in your Start menu.
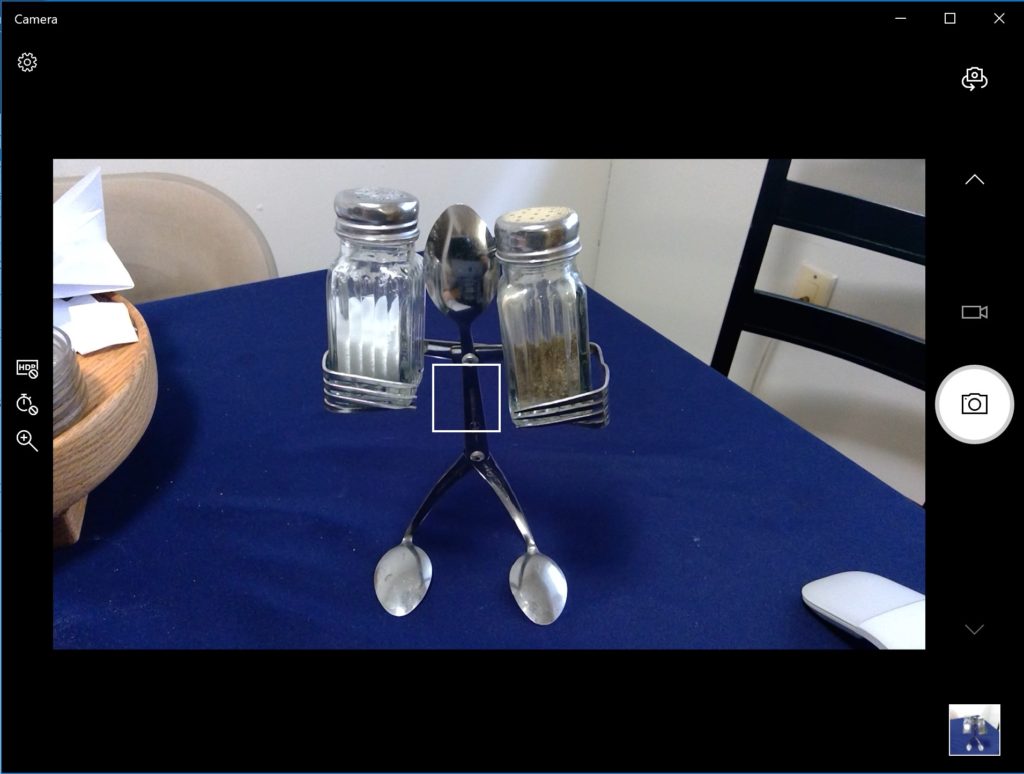
- Your camera app will open and you should see a front or rear view, depending on what type of camera your computer has.
- Use the Change Camera button at the top-right of the window to switch between your built-in webcam and any other camera attached to your computer.
- If you’re using an external webcam, make sure that it’s connected and positioned properly.
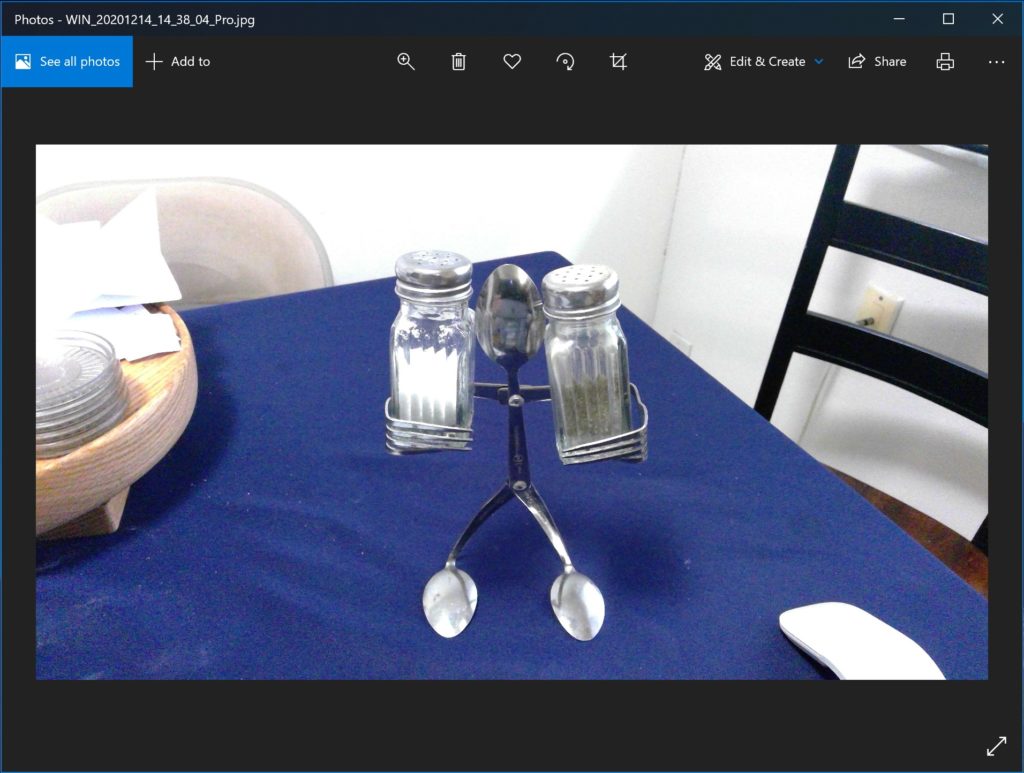
- Click the shutter button on the right-hand side of the window to take a picture.
Applies to: Windows 10, Surface Pro, Surface Laptop, Surface Go, Surface Book
Taking a picture on your computer isn't always practical. For example, you might not want to bring your laptop to a rock concert or the beach to capture photos.
However, there are some useful applications. If you want to quickly share a photo with friends or family, you can capture an image and instantly share it online!
Another great use for your laptop's camera is taking pictures of documents! This is especially convenient if your laptop has a rear camera. The Windows Camera app can automatically recognize a document and crop it accordingly. This makes it easy to scan documents to your computer without a printer.
How To Take A Picture On A Computer (MacOS)
To take a picture on your MacOS device, try these steps:
- Open the Photo Booth app.
- Make sure to connect any external webcams.
- In the lower left, you can choose to take four pictures, a single picture, or a video.
- Click the Take Photo button in center of the screen to snap a picture.
Applies to: MacOS, Macbook Pro, Macbook air
How To Take Screenshots
Both Windows 10 and MacOS have built-in methods for taking screenshots. Windows 10 uses a feature called Snip and Sketch, while MacOS uses Screenshot Toolbar.
If you're looking to take screen recordings — or videos of your screen — check out our article article on how to screen record on a laptop for more details!
How To Take Screenshots On Windows 10
To take screenshots on Windows 10, follow these steps:
- Simultaneously press the Windows + Shift + S keys.
- Click and drag across the screen to designate the area that you want to screenshot.
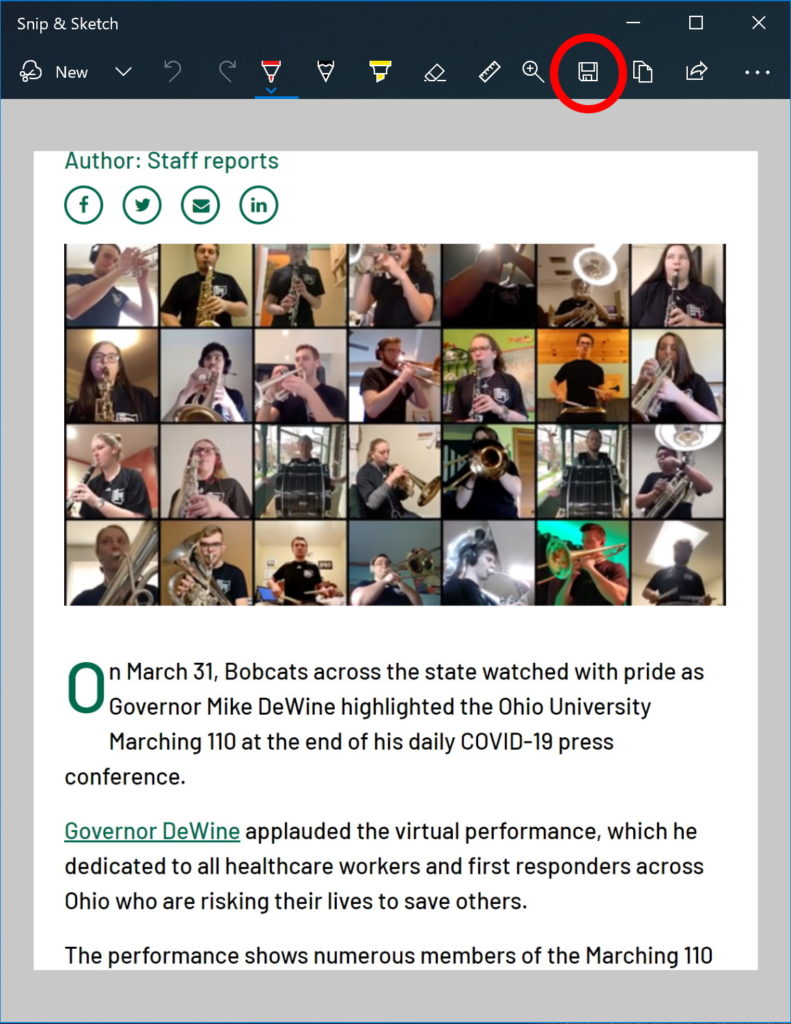
- A popup will appear in the lower-right for Snip and Sketch. If you’d like to mark up the screenshot, click on it.
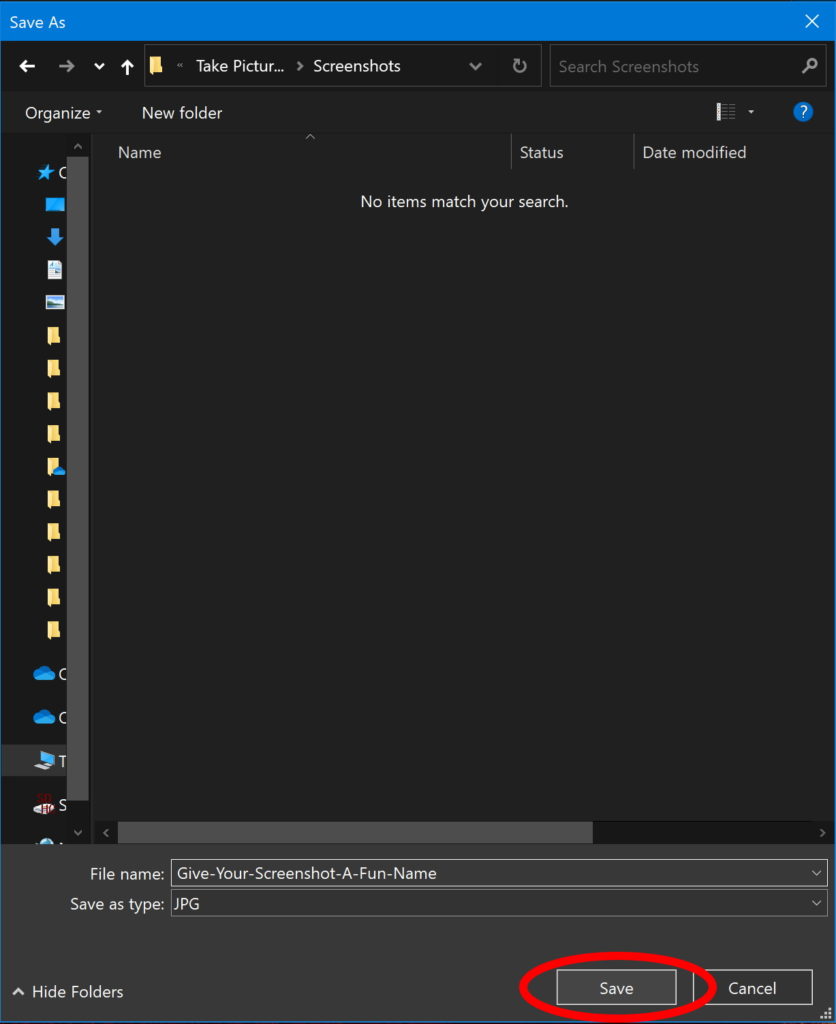
- From this view, you can save your screenshot to the folder of your choice.
Additionally, after you’ve selected the area for your screenshot, a blank version will be automatically saved to your clipboard. This allows you to paste it anywhere, such as in a text field or in a chat with a friend.
Applies to: Windows 10, Surface Pro, Surface Laptop, Surface Go, Surface Book
There are a few ways to take a screenshot with your computer on Windows 10, but my favorite method is Snip and Sketch. With this app, it's easy to capture either your entire screen or a specific area. It also lets you mark up the screenshot and save it to a specific folder.
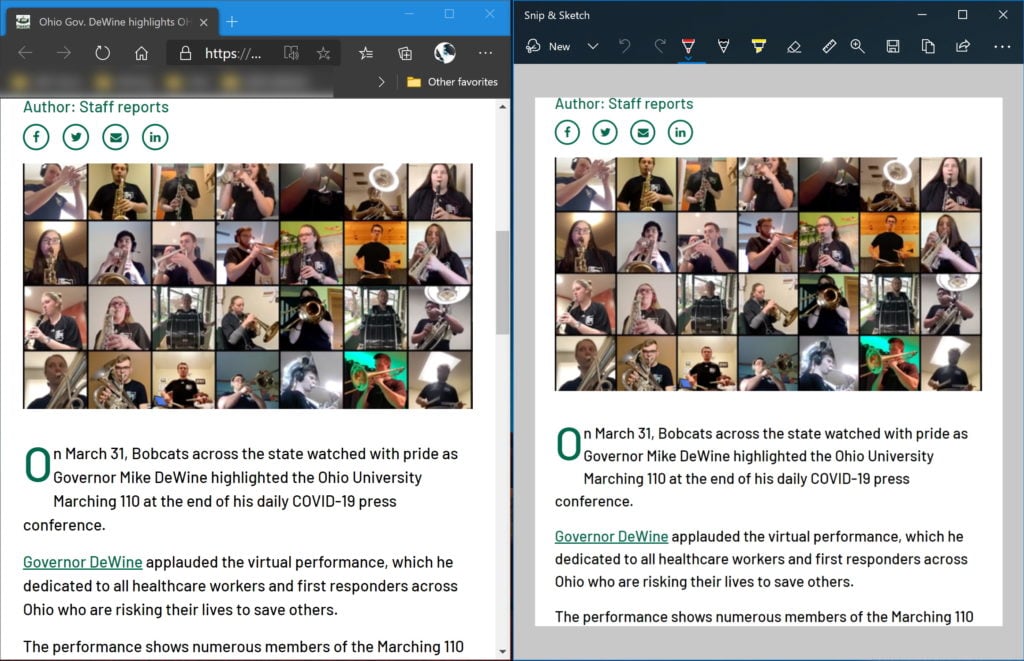
Many of the screenshots that I use in my articles for UpPhone come directly from Snip and Sketch. The other big advantage is that once you capture the screenshot, it will save to your clipboard. This lets you paste it into a text field like Facebook Messenger or Discord, so you can quickly send your friend a picture of something on your screen.
How To Take Screenshots On MacOS
In order to capture a picture of your screen on a MacOS device, follow these steps:
- Hold down the Shift + Command + 3 keys to take a screenshot of your entire screen.
- Hold down the Shift + Command + 4 keys to take a screenshot of a portion of your screen.
- If you want to choose a specific area to capture, click and drag to select the area.
- Click on the thumbnail in the corner of your screen to view and edit the screenshot.
Applies to: MacOS, Macbook Pro, Macbook air
Say Cheese!
Ready to snap some pictures with your webcam and capture some screenshots? Hopefully, this guide has helped you learn how to do both. If you have any more questions about how to take pictures on your computer, let me know with a comment below!
Thank you for reading! If you enjoyed this article, please share it with your friends and family!


how can i share my pic with someone with my iphone